Home Decor
Notice: Function wpdb::prepare was called
incorrectly. The query argument of wpdb::prepare() must have a placeholder. Please see
Debugging in WordPress for more information. (This message was added in version 3.9.0.) in
/var/www/vhosts/indiavision.com/httpdocs/wp-includes/functions.php on line
6085
Notice: Function wpdb::prepare was called
incorrectly. The query does not contain the correct number of placeholders (0) for the number of arguments passed (1). Please see
Debugging in WordPress for more information. (This message was added in version 4.8.3.) in
/var/www/vhosts/indiavision.com/httpdocs/wp-includes/functions.php on line
6085
Cabinets and Countertops
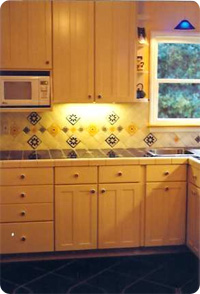
Cabinets and countertops offer the much-needed storage space in the
bathroom to store your toiletries, keep medicines and first-aid box,
cleaning milk, moisturizer and deodorants, towels and napkins
besides other things that you use daily while showering in your
bath. They are powerful accents to your bath décor and help you to
define the tone and style of the bathroom and make the best use of
the wall and floor surface of the area. They also are pivotal in
keeping your bath well organized and efficient. Here are some tips
that you can use while installing cabinets and countertops in the
bathroom to give them the trendy look you have always desired:
- Medicine cabinets often go in the back or sidewalls that frame
the vanity and it's easier to put them in before the vanity. Also,
take the doors off all the cabinets to avoid damaging them during
installation. Fit the cabinet snugly between the 2 x 4's in the stud
wall. At the proper height, box in an opening in the drywall between
the studs and slide the cabinet in. Level the top of the frame and
secure it. Many vanity cabinets go together with the drawers in or
between two cabinets. Most don't have the top fastened because it's
easier to handle and fit that later. Using a level, find the floor's
high point to determine the cabinets' high point.
- Mark a level line through that point across the wall. That
reference line guides all the cabinet tops. Intersect that line with
a plumb line down the middle. Any middle cabinet goes in first. Draw
a line down the center of its back and line it up with the guide
line. Transpose pipe locations to the cabinet back and
drill pipe holes with a spade bit. Slide the
cabinet into place, level the top and secure it to the wall studs
with drywall screws. Flush and plumb the other cabinets. Use a wood
clamp to tie the front frames together and screw them together.
- NOTE: A gap is often left where a cabinet meets the wall. Fill
it in with a trim piece cut to fit snugly in the gap. Screw through
the cabinet 's side frame into the trim's side to fasten them.
- Cut and fit 3/4" plywood to cover the vanity top. From the
center reference line used to set the cabinets, find the center
point of the cabinet front. Center the countertop and secure it to
the tops of the cabinets using drywall screws up through the bottom.
For an added touch, build up the edges of the countertop. This also
prevents the doors/drawers from hitting the trim pieces. For trim,
we added 3/4" plywood strips cut to fit along the edges that were
held with a bead of construction adhesive and screws. Mark the
centerpoints for the sink opening(s) and draw a center line
connecting the points. Vanities usually include a template to
outline the sink opening. Use the reference line to position the
template and trace around it. Drill a pilot hole to start the jig
saw blade and cut out the opening. Now the countertop is ready for
tiling.
- WARNING: Most laminate countertops are glued with very flammable
cement. Work in a well-ventilated area, avoid open flames (like
furnace pilots) and always follow the
manufacturer's directions.
- Particleboard is an inexpensive material for making laminate
countertops. Cut a 4 x 8 sheet of particleboard to size and add
bottom supports where joining pieces. With construction adhesive,
glue on any edge pieces and test-fit the countertop. Use a utility
knife (to score then snap), jig saw or circular saw (fine-toothed
blade) to cut laminate pieces. Which side you cut laminate depends
on the tool. Cut a scrap piece first on both the front and back to
see which way cuts smoothest and chips less. Apply contact cement to
both laminate and particleboard edge pieces. Once the cement dries
to the touch, carefully line up the pieces and attach the laminate.
- Use a rolling pin or roller to make good contact and to squeeze
out any air bubbles.
- NOTE: Once the laminate and cement come into contact they
usually stay that way and are difficult to reposition. Use cardboard
or kraft paper inserts between the pieces to position and line them
up.
- Let the edges set up as directed. Then cut off the excess with a
router using a carbide laminate-trimming bit. Glue the top piece the
same way. Apply contact cement to both the laminate and
particleboard. Let them dry to the touch and use cardboard strips to
position the laminate. Pull out the strips, press laminate into
place with a rolling pin or roller and router the edges flush. To
fasten the countertop, insert spacer blocks underneath the top
cabinet bracing at the corners and screw through the blocks and into
the countertop.
- Installing A Laminate Backsplash
- A laminated backsplash can also be attached to the countertop
with drywall screws drilled from the bottom side of the countertop.
Since the wall may not be totally even, leave off the top laminate
piece of the backsplash. Butt it tight to the wall, glue it down and
trim the front edge flush. Or, belt sand the backside of the
backsplash to fit the wall. Dryfit the countertop and once it's
positioned correctly on the cabinets drive screws up through the
cabinet framing into the countertop.
| |
Other Categories
Notice: Function wpdb::prepare was called incorrectly. The query argument of wpdb::prepare() must have a placeholder. Please see Debugging in WordPress for more information. (This message was added in version 3.9.0.) in /var/www/vhosts/indiavision.com/httpdocs/wp-includes/functions.php on line 6085
Notice: Function wpdb::prepare was called incorrectly. The query does not contain the correct number of placeholders (0) for the number of arguments passed (1). Please see Debugging in WordPress for more information. (This message was added in version 4.8.3.) in /var/www/vhosts/indiavision.com/httpdocs/wp-includes/functions.php on line 6085
Bathroom Flooring
Bathroom Framing Basics
Bathroom Lighting
Cabinets and Countertops
Ceramic Tile
Demolition Of Old Baths and Wall Surfaces
Desirable Bathrooms and Locality Rules
Drywall and Backer Board
Finishing Touches To Bath Room
Tips For Bathroom Fixtures
Mechanical Systems Of Bathrooms
The Perfect Bathroom Design
Main Categories
Notice: Function wpdb::prepare was called incorrectly. The query argument of wpdb::prepare() must have a placeholder. Please see Debugging in WordPress for more information. (This message was added in version 3.9.0.) in /var/www/vhosts/indiavision.com/httpdocs/wp-includes/functions.php on line 6085
Notice: Function wpdb::prepare was called incorrectly. The query does not contain the correct number of placeholders (0) for the number of arguments passed (1). Please see Debugging in WordPress for more information. (This message was added in version 4.8.3.) in /var/www/vhosts/indiavision.com/httpdocs/wp-includes/functions.php on line 6085
Lifestyle Safety
Planning Bathrooms
Building A House
Home Cleaning
Home Color Scheme
Decorating Homes Ideas
Safety Tips For Do-It-Yourself
Feng Shui Homes To Enjoy
Home Exteriors
Decorating First Homes
Flooring The House
Furnishing Homes
Buying Furniture For Home
Christmas Decoration
Control Home Problems
Designing A New Kitchen
Home Lighting
Painting Wood Panel
Remodeling House
Safety At Home
Seasonal Decoration
Home Storage Solutions
Fabric Window
|
