DIY Sanding
Staining wood can bring out the natural color, feel and grain of the
wood. Staining can enhance the beauty of old furniture in the house
and give the entire room a new lease of life. Staining is the last
stage that gives the furniture its new look. Before this is done the
furniture has to be prepared to receive the stain and this process
is called sanding. Though time consuming it is an essential step in
staining. Here are a few pointers to help you through the sanding
process.
Sandpaper is graded depending on the number of sand granules per
square inch of paper. The greater the number the finder the grade of
paper. Smaller grade number, coarser the sandpaper. This number is
usually printed behind the paper. Medium grade paper is used to
remove the existing finish from furniture and antiques. Fine graded
paper is for the last sanding of furniture just before staining the
wood.
For delicate furniture and a fine finish it is best to use hand
sanding. Make sandpaper pieces that are large enough to hold with
three fingers. If you find it more comfortable wrap a piece of
sandpaper around a block of wood that you can hold with ease. Or you
could use a contoured sanding block that is easily available in the
hardware store. This block has grooves at the ends of the block into
which you can inset the sandpaper. Inspect the surface of the wood
to be worked on, you will see pores that form a pattern, this is the
grain of the wood. Sand in the direction of the grain never against
it. Sanding against the grain will cause scratches that will show up
on finished wood especially after staining.
Place the sanding block horizontally on the surface with the grain
of wood. Hold the block firmly and apply pressure equally as you
move the block too and froe. If you apply more pressure than needed
the block it will cause depressions on the surface. Even while using
the mechanical palm sander, a lightweight-rotating sander, hold it
flat against the surface and evenly apply pressure.
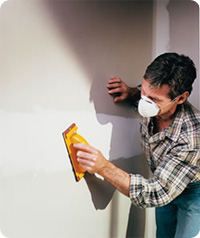
Before staining the wood dust must be taken off the surface. Use
tack cloth or cheesecloth made for removing dust. Once one side of
the cloth gets dusty, refold and use fresh side of cloth. To prevent
tack cloths from drying store them in plastic bags that can be
sealed. As you will be working with wood dust use a sanding particle
mask to prevent inhalation of dust.
| |
Other Categories
Bathroom DIY
Build A Home Theater
DIY Ideas For Lighting And Window Treatment
DIY Sanding
Staining Wood
DIY Refinishing
Vaastu Shastra and Feng Shui
Kid Wallpaper
Main Categories
Lifestyle Safety
Planning Bathrooms
Building A House
Home Cleaning
Home Color Scheme
Decorating Homes Ideas
Safety Tips For Do-It-Yourself
Feng Shui Homes To Enjoy
Home Exteriors
Decorating First Homes
Flooring The House
Furnishing Homes
Buying Furniture For Home
Christmas Decoration
Control Home Problems
Designing A New Kitchen
Home Lighting
Painting Wood Panel
Remodeling House
Safety At Home
Seasonal Decoration
Home Storage Solutions
Fabric Window
|
